Editing blackout dates
-
In the upper-left corner of the screen, select Access your applications (
 ).
).
The menu expands. -
Select Setup > T&A > Blackout Dates.
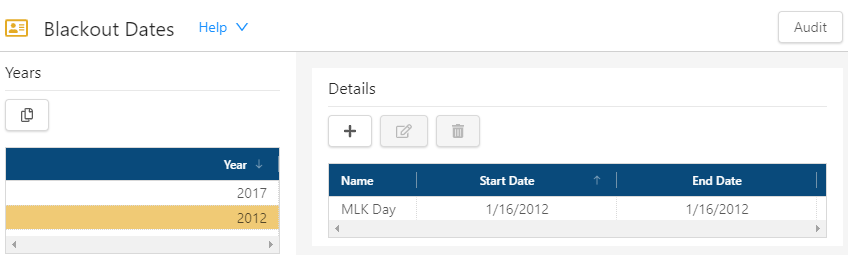
The Blackout Dates screen appears.
-
In the Years pane, select the year from which to delete blackout dates.
Blackout dates for the selected year appear in the Details pane. Click here for field descriptions.
Fields on the Blackout Dates screen
Field Description Notes Audit
View a history of changes to the screen.
Years

Copy
Creates a new year with the same blackout dates as the selected year. If many of your blackout periods are the same from year-to-year, use this option to copy the blackout dates from one year to the next.
Year list
Select a year from the list to manage all blackout dates for the year.
Details

Add
Add new blackout dates to the selected year.

Edit
Change the name or dates of the selected blackout date.
This button is available only if a blackout date is selected.

Delete
Remove the selected blackout dates.
This button is available only if a blackout date is selected.
Name
Name for the blackout date. For example, Black Friday or Labor Day Weekend. Read-only.
Start Date
Date when the blackout dates are in effect.
A blackout date can be a single date or a date range.
Read-only.
End Date
Date when the Blackout Dates are no longer in effect.
A blackout date can be a single date or a date range.
Read-only.
-
Select the blackout date that you want to change.
-
Select Edit (
).
The Edit Blackout Dates dialog box opens. -
Make changes to the name or date range as necessary.
-
Select Submit.
Your changes are saved.
For more information, seeBlackout Dates.