Working with the Enter Scheduled Hours screen
If your organization does not use the Labor component of RMS for scheduling, use the Enter Scheduled Hours screen to manually enter scheduled hours and costs in RMS. If you plan to generate and use certain reports, you must manually enter scheduled hours and costs that are not automatically generated by RMS.
-
In the upper-left corner of the screen, select Access your applications (
 ).
).
The menu expands. -
Select Labor> Planning.
The Planning screen appears.
-
Find and run the Enter Scheduled Hours task in the Planning menu.
The Enter Scheduled Hours screen appears.
If you are using Quick View:
-
Find the task to update or run by moving through the task sub-screens:
-
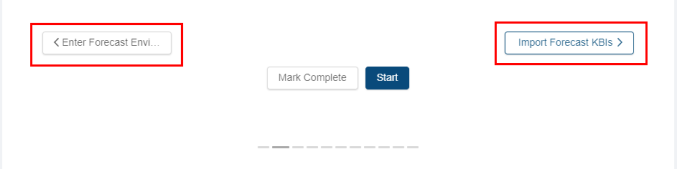
Select previous or next task buttons.
or -
Select the dashed lines of the screen selector.

-
-
When you get to the task, do one of the following:
-
To start or run the task for the first time, select Start.
The selected task opens in either separate tab or in a pane, depending on the task. -
To update the task (if it has already been started), select Update.
-
If you are using List View:
-
Find the task to update, run, or mark complete by scrolling down the screen.
-
When you get to the task, hover the mouse pointer over the status label.
A drop-down list appears.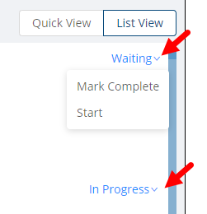
-
From the drop-down list, select one of the following:
-
To start or run the task for the first time, select Start.
The selected task opens in either separate tab or in a pane, depending on the task. -
To update the task (if it has already been started), select Update.
The selected task opens in either separate tab or in a pane, depending on the task.
-

Fields on the Enter Scheduled Hours screen
| # | Field | Description | Notes |
|---|---|---|---|
|
1 |
Help |
Overview of the screen. Select the collapse arrow ( |
Read-only. |
|
2 |
My Jobs / Labor Structure selectors |
Select a tab to change the left pane:
|
Default: My Jobs |
|
|
My Jobs / Labor Structure selector panes |
Default: My Jobs |
|
|
2a |
My Jobs | ||
|
Job Name |
Name of the job. |
Read-only. |
|
|
Shift Category |
Drop-down menus that contain all available shift categories. |
|
|
|
Edit My Jobs |
Opens the Edit My Jobs dialog box where you can specify which jobs appear in the My Jobs pane. |
|
|
|
2b |
Labor structure | ||
|
Shift Category |
Drop-down menu that contains all available shift categories. |
|
|
|
Expand All/ Collapse All |
|
|
|
|
Search |
Search field for entering the name of job or labor structure level. The tree menu updates to match your entry. Select the X to clear your entry. |
|
|
|
Labor structure |
Tree menu of all jobs in the labor structure. Select the levels to display in the table. |
You can select only one job. |
|
|
|
Controls | ||
|
3 |
Scheduled Period |
Selects the week for which to enter scheduled hours. |
|
|
Current |
Selects the current week. |
|
|
|
Back/Forward |
Select the arrows to go to the previous or next scheduling period. |
|
|
|
4 |
Enter Hours and Costs |
Opens the Manual Entry dialog box where you enter hours and costs. |
Available only if both a job and shift category is selected. |
|
|
Table | ||
|
5 |
Scheduled |
Scheduled hours and costs grouped by source. |
Read-only. |
|
6 |
Scheduled hours and costs |
Scheduled hours entered for the labor structure level and day. |
Read-only.
|
 ) or the expand arrow (
 ) to expand.
 )—Expands the tree menu to display all labor structure levels.
On the Enter Scheduled Hours screen, you perform the following tasks:
Customizing the My Jobs pane
You can customize the My Jobs pane to display only the jobs for which you are responsible.
-
Select the My Jobs tab.
-
Select Edit My Jobs.
The Edit My Jobs dialog box appears. -
If necessary, do the following:
-
To expand the tree menu to display all labor structure levels, select Expand All (
 ).
). -
To collapse the tree menu to hide all labor structure levels, select Collapse All (
 ).
). -
To filter the tree menu, type the desired job in the Search (
 ) field.
-
-
Select the jobs to add.
Note: You cannot select the tree menu node for an entire division or department. You must select the individual jobs within those divisions or departments.
-
Select Save.
-
The dialog box closes, and the list of jobs in the My Jobs pane updates to reflect your selections.
-
From the Shift Category drop-down lists, select the shift category to apply to each job in your list.
The application remembers your selection for future sessions.
Entering scheduled hours and costs
All scheduled entries must be applied to a job and shift category.
Tip: To save time, use the My Jobs pane to create a list of jobs for which you will enter data for on a regular basis. For more information, see Customizing the My Jobs pane.
-
Do one of the following to select the scheduled period to work with:
-
Select the Scheduled Period date range field and select a range from the drop-down list.
-
To select the current scheduled period, select Current.
-
Select the Previous (
 ) or Next (
  ) arrows to go to the previous or next period.
-
-
In either the My Jobs or the Labor Structure pane, do one of the following to select the job and shift category:
-
In the My Jobs pane:
-
Select the My Jobs tab.
-
Select the job for which to enter scheduled hours.
-
If necessary, apply a shift category to the job:
Note: The first time you enter hours, you must apply shift categories to jobs. The application then remembers your selection for future sessions.
-
In the row of the desired job, select Shift Category.
-
From the drop-down list, select a shift category for which to enter scheduled hours.
The table updates based on your selection.
-
-
-
In the Labor Structure Pane:
-
Select the Labor Structure tab.
-
In the tree menu, select the job. If necessary, do the following:
To expand the tree menu to display all labor structure levels, select Expand All (
).To collapse the tree menu to hide all labor structure levels, select Collapse All (
).To filter the tree menu, type the desired job in the Search (
) field.
- Above the tree menu, select the Shift Category field and select the shift category from the drop-down list.
The table updates based on your selection.
-
-
-
In the upper-right corner of the screen, select Enter Hours and Costs.
The Manual Entry for ... dialog box appears. -
Select the desired cell and enter the scheduled hours or costs.
Note: Depending on the selected cell, you enter either hours or dollar amounts.
-
Select Save.
The dialog box closes, and the Enter Scheduled Hours table updates based on your entries.