Working with the Weekly Availability screen
Your weekly availability refers to your schedule of work availability for the week, that is, the days that you are required to have off and the days that you prefer to have off. Use the Weekly Availability screen to view, add, cancel, or edit availability in your work schedule.
Adding an availability request
-
In the upper-left corner of the screen, select the main menu icon (
 ).
).
The menu expands. -
From the drop-down list, select Weekly Availability.
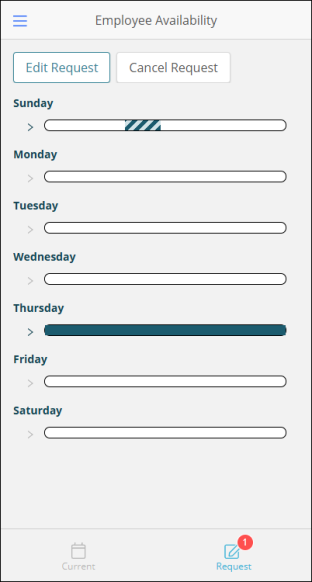
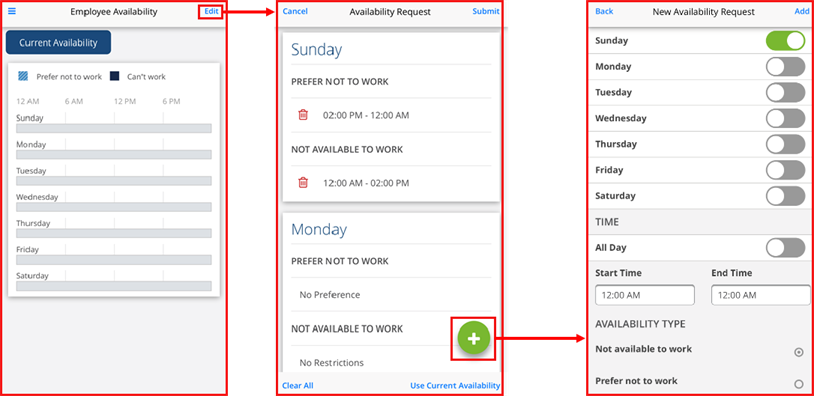
The Employee Availability screen appears. The default Current tab shows your current availability.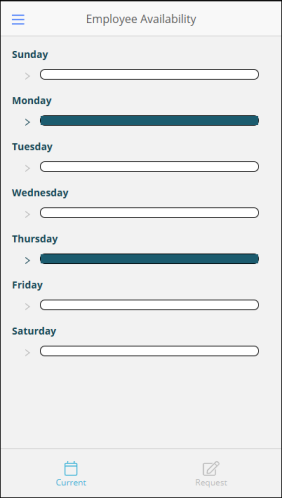
-
At the bottom of the screen, select Request (
 ).
).
The Add Request screen appears.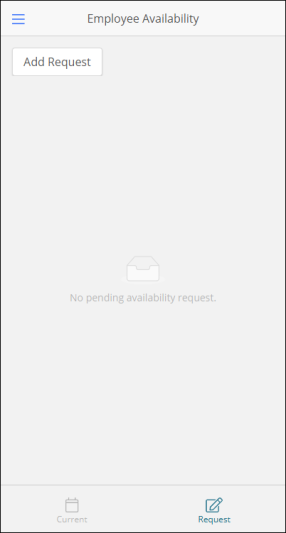
-
Select Add Request.
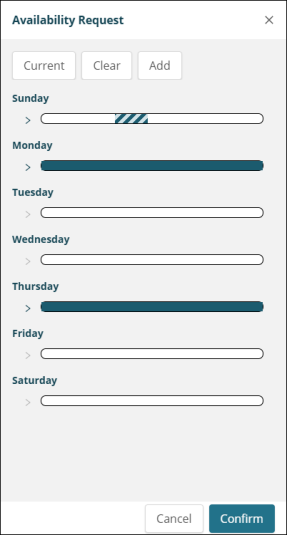
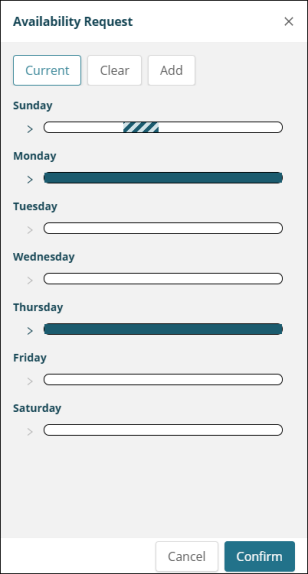
The Availability Request screen appears.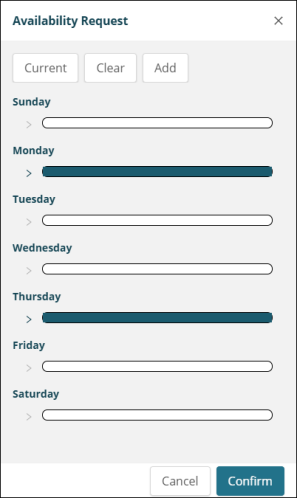
This screen offers three options:
-
Current—Reset the availability schedule to your current availability. For example, your current availability schedule designates Mondays and Thursdays as required days off. If you are editing your availability to add additional time off and then decide that you do not need the additional days, selecting Current resets your availability schedule to the current version. (If you have no current availability, this will clear the request.)
-
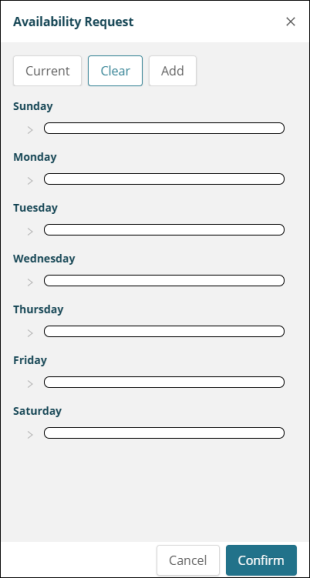
Clear—Clear your entire availability schedule, enabling you to completely redefine your days and times. This feature is useful when significantly updating your current availability.
-
Add—Add specific days and times to your calendar.
Note: On this screen, you can also delete specific days and times in your availability schedule.
-
-
Do one of the following:
-
To add new days and times to your availability schedule:
-
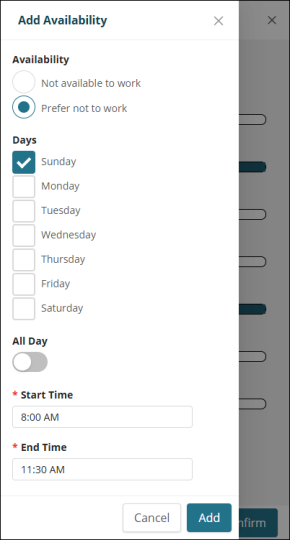
Select Add.
-
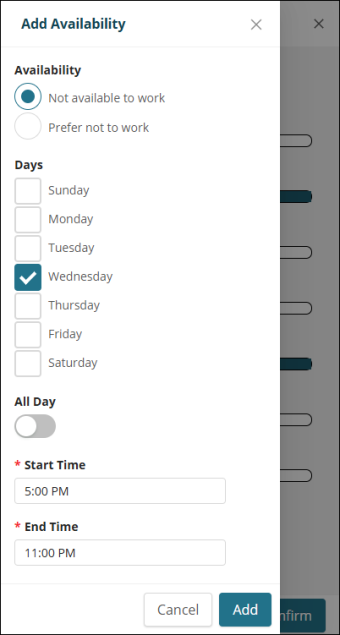
Specify the following details:
-
Availability—Choose whether you are Not available to work or Prefer not to work.
-
Days—Select the days of the week for your request.
-
All Day—If your requests last all day, select All Day (
 ).
). -
Start Time / End Time—If you did not select the All Day option, specify the time frame for which you are unavailable.
-
-
Select Add.
-
-
To reset your calendar to your current availability, select Current.

-
To clear your entire availability schedule so that you can completely redefine your days and times, select Clear.

-
To delete specific days and times in your availability schedule:
-
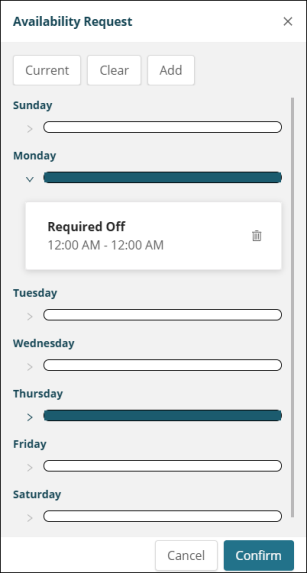
Select the availability bar for the request you want to delete.
The request section expands. -
Select the delete button (
 ).
).
-
-
-
Select Confirm.
-
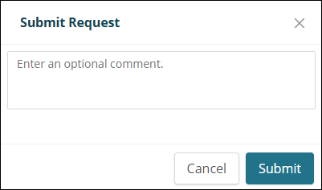
(Optional) Enter a comment.

-
Select Submit.
The numeral 1 appears in a red circle on the Request button to indicate that the request is now pending and must be approved by your manager.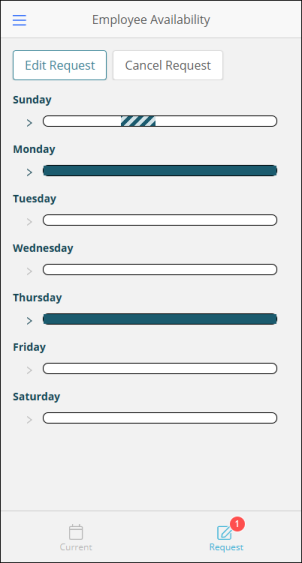
Editing a pending availability request
-
In the upper-left corner of the screen, select the main menu icon (
).
The menu expands. -
From the drop-down list, select Weekly Availability.
The Employee Availability screen appears.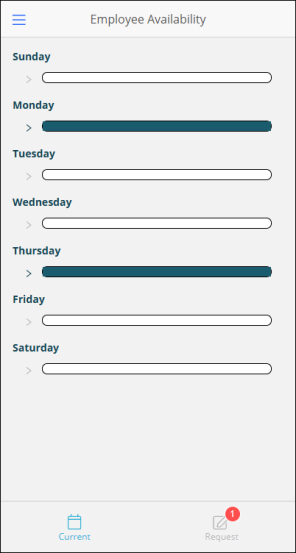
-
At the bottom of the screen, select Request (
 ).
).
The Edit Request and Cancel Request options appear.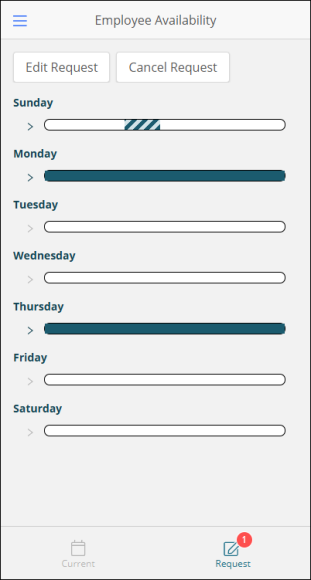
-
Select Edit Request.
The Availability Request screen appears.
This screen offers three options:
-
Current—Reset the availability schedule to your current availability. For example, your current availability schedule designates Mondays and Thursdays as required days off. If you are editing your availability to add additional time off and then decide that you do not need the additional days, selecting Current resets your availability schedule to the current version. (If you have no current availability, this will clear the request.)
-
Clear—Clear your entire availability schedule, enabling you to completely redefine your days and times. This feature is useful when significantly updating your current availability.
-
Add—Add specific days and times to your calendar.
Note: On this screen, you can also delete specific days and times in your availability schedule.
-
-
Do one of the following:
-
To add new days and times to your availability schedule:
-
Select Add.
-
Specify the following details:
-
Availability—Choose whether you are Not available to work or Prefer not to work.
-
Days—Select the days of the week for your request.
-
All Day—If your requests last all day, select All Day (
). -
Start Time / End Time—If you did not select the All Day option, specify the time frame for which you are unavailable.
-
-
Select Add.
-
-
To reset your calendar to your current availability, select Current.
-
To clear your entire availability schedule so that you can completely redefine your days and times, select Clear.
-
To delete specific days and times in your availability schedule:
-
Select the availability bar for the request you want to delete.
The request section expands. -
Select the delete button (
).
-
-
-
Select Confirm.
-
(Optional) Enter a comment.
-
Select Submit.
The numeral 1 appears in a red circle on the Request button to indicate that the request is now pending and must be approved by your manager.Note: A new request will overwrite a pending request.
Canceling a pending request
-
In the upper-left corner of the screen, select the main menu icon (
).
The menu expands. -
From the drop-down list, select Weekly Availability.
The Employee Availability screen appears.
-
At the bottom of the screen, select Request (
).
The Edit Request and Cancel Request options appear.
-
Select Cancel Request.
A confirmation message appears.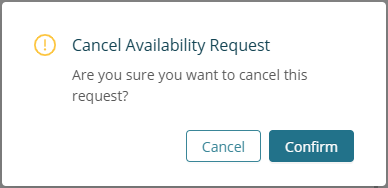
-
Select Confirm.
Your manager will receive a notification that you have canceled your request.
Legacy Mobile App screen
The Unifocus Mobile App is currently being redesigned. If you do not see the screens shown above, you are using an older version of the app. Contact your Unifocus Client Success Manager (CSM) to turn on the new screens.
The Weekly Availability screen can be used to view and make changes to your availability schedule.
-
Add an Availability Request
-
Delete an Availability Request
-
Clear all Availability Requests
Add an Availability Request
-
In the upper-left corner of the screen, tap the main menu icon.
The menu expands. -
From the drop-down list, select Weekly Availability.
The Employee Availability screen appears. -
In the upper-right corner of the screen, select Edit to change your Current Availability schedule.
The Availability Request screen appears. -
In the lower-right corner, select the Add button (
 ).
).
The New Availability Request screen appears. -
Use the toggle to choose which days to apply the availability to.
-
Enter the Start Time and End Time.
-
Choose the Availability Type to apply to the selected time frame.
-
Not available to work—The Unifocus software will not automatically schedule the employee for the selected time frame.
-
Prefer not to work—The Unifocus software will schedule the employee only if necessary.
-
-
In the upper-right corner of the screen, select Add to confirm your selections and return to the Availability Request screen.
Your Availability Request is saves and appears on the Availability Request screen. -
In the upper-right corner of the screen, select Submit after you have finished creating requests.
Your requests are sent to the manager for approval.
Delete an Availability Request
-
In the upper-left corner of the screen, tap the main menu icon.
The menu expands. -
From the drop-down list, select Weekly Availability.
The Employee Availability screen appears. -
In the upper-right corner of the screen, select Edit to change your Current Availability schedule.
The Availability Request screen appears. -
Tap the trash can icon next to an Availability Request to delete the requests.
The request is removed from the Availability Request screen.
Clear all Availability Requests
-
In the upper-left corner of the screen, tap the main menu icon.
The menu expands. -
From the drop-down list, select Weekly Availability.
The Employee Availability screen appears. -
In the upper-right corner of the screen, select Edit to change your Current Availability schedule.
The Availability Request screen appears. -
In the lower-left corner of the screen, select Clear all.
The Availability Request screen is cleared of all requests.