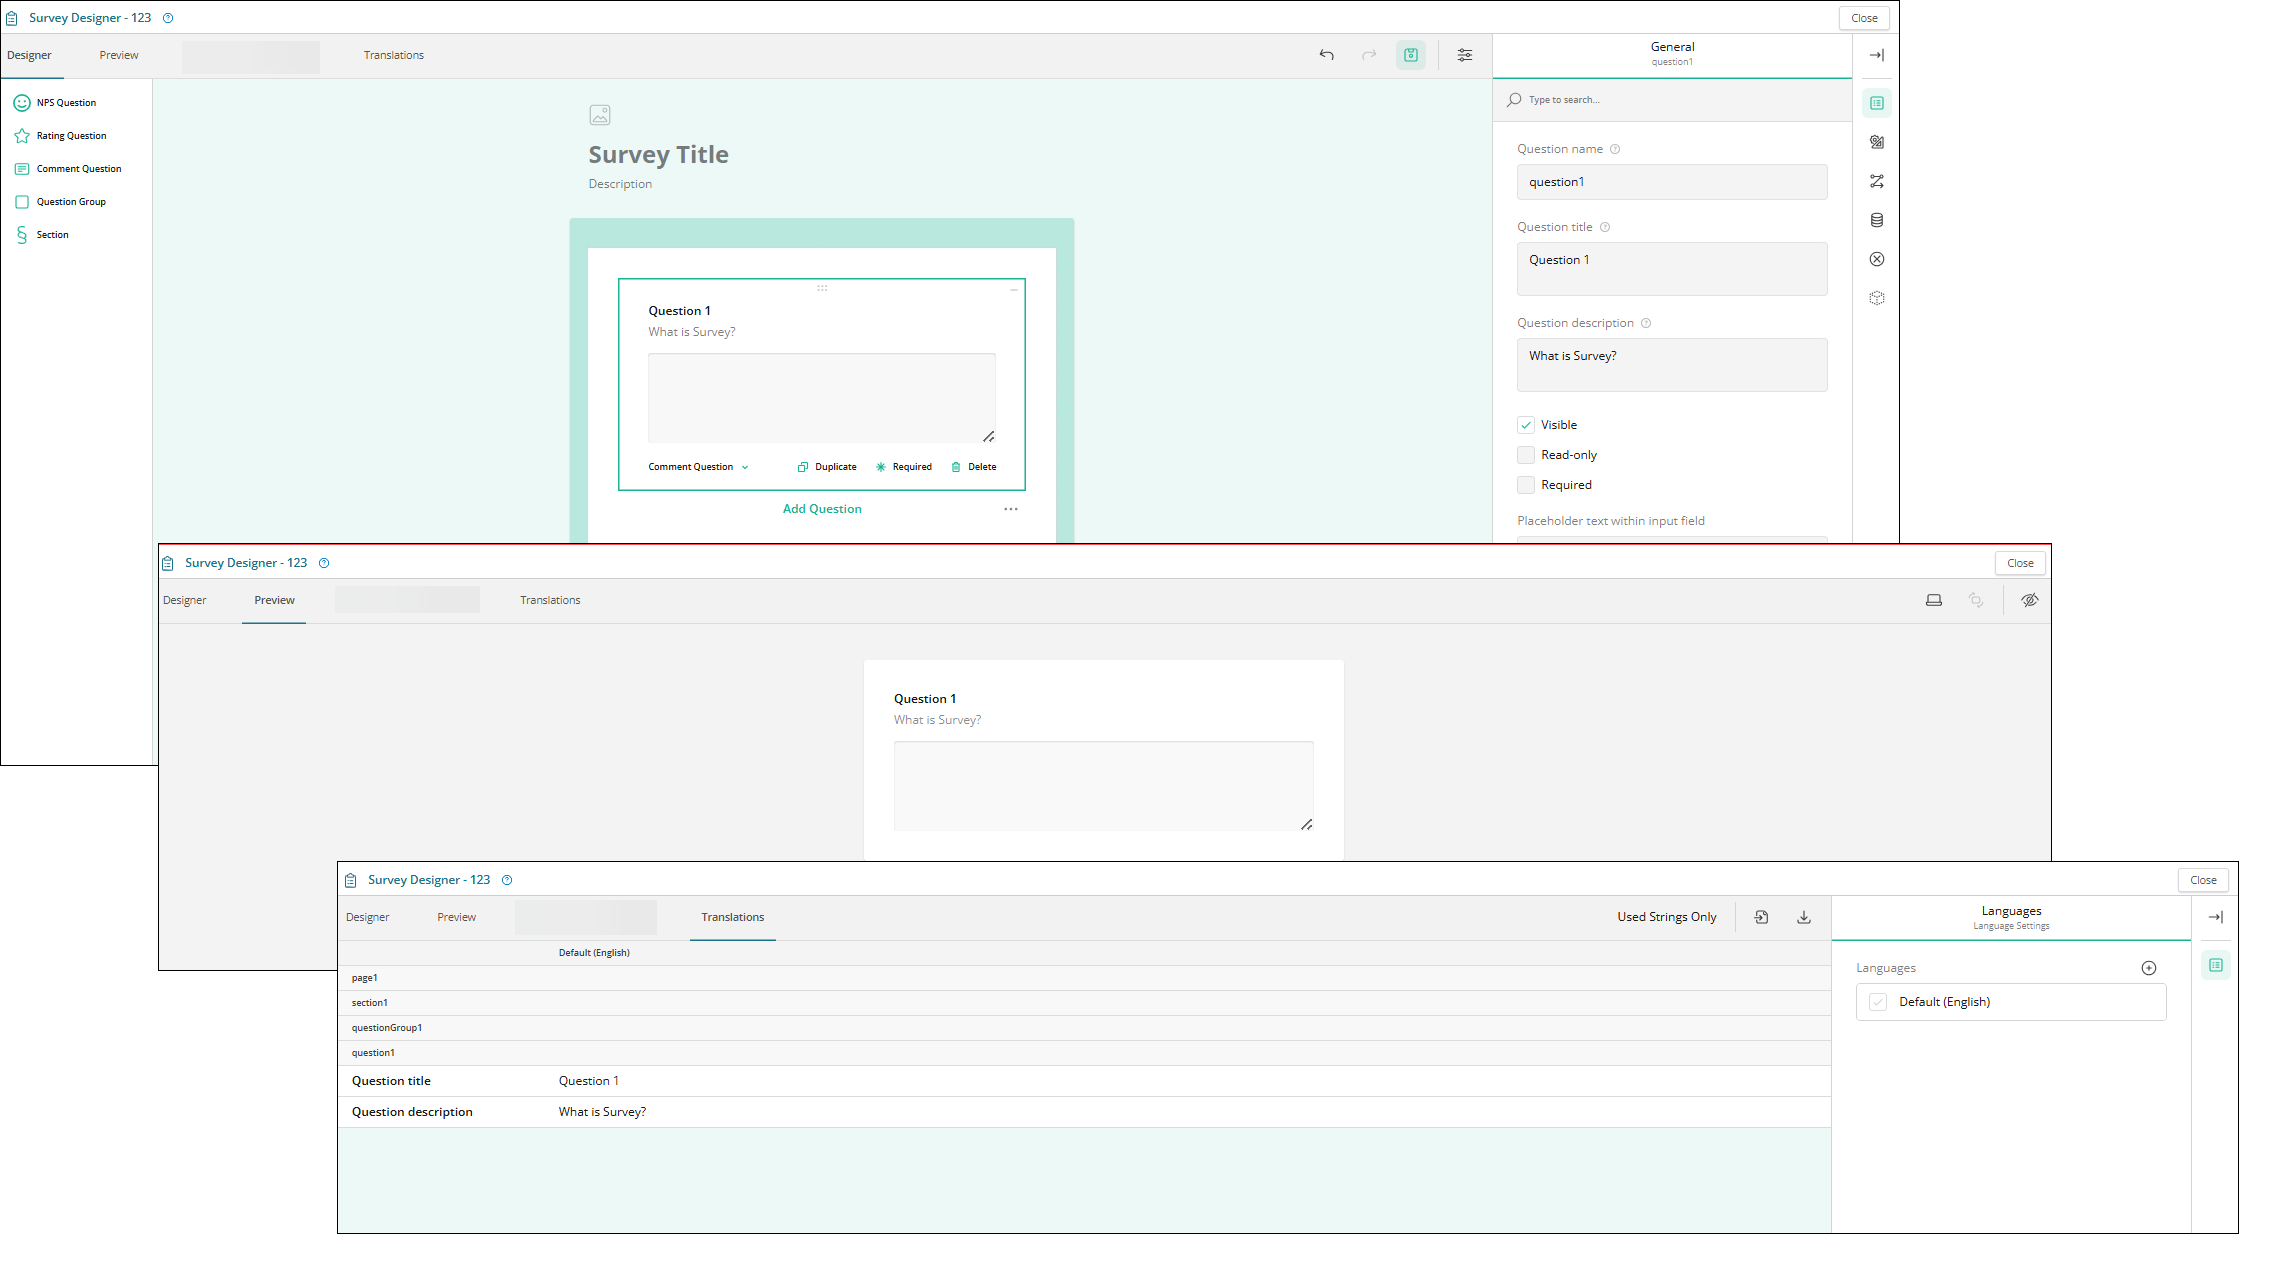
Survey Designer screen
Use the Survey Designer screen to build a survey by adding sections, question groups, and individual questions. You can include question types such as Net Promoter Score (NPS), rating, and comment questions. Survey Designer allows you to preview the survey layout and apply translations as needed.
The Survey Designer screen displays three separate tabs:
Fields on the Designer tab
| # | Field | Description | Notes |
|---|---|---|---|
| 1 |
Left Panel |
Available question types include:
|
Required. |
|
2 |
Survey Designer section |
General survey actions:
Add section actions:
Add question group actions:
View and layout controls:
|
Required. |
|
3 |
Property sheet |
Displays the same editable options available in the survey designer screen. You can add or edit the survey title, add sections, add question groups, and add questions directly from either the center panel or the property sheet. Use the property sheet for quick access and efficient configuration. Available actions include:
|

Fields on the Preview tab
| # | Field | Description | Notes |
|---|---|---|---|
|
1 |
Question title |
Enter the question title. |
Required. |
|
2 |
Question description |
Enter the question description. |
|
|
3 |
Maximize/Minimize |
Select to expand or collapse the question view. |
|
|
4 |
Complete |
Mark the question or section as complete once you finish editing it. This simulates a submission and helps users understand how the survey will behave once it is submitted by an actual respondent. |
Required. |
|
5 |
Select device type |
From the drop-down list, select the required option to preview how the survey appears on different devices (For example, mobile, tablet, and desktop). |
|
|
6 |
Show invisible elements |
Select or hide the required option to display elements that are not currently visible in the survey layout. |

Fields on the Translations tab
| # | Field | Description | Notes |
|---|---|---|---|
|
1 |
Import from CSV |
Upload the translations by selecting a CSV file from your device. |
|
|
2 |
Export to CSV |
Download the translations in CSV format for backup or editing. |
|
|
3 |
|
Add a new language to the survey to support multilingual responses. |
|
|
4 |
|
Show/Hide the side pane to expand your workspace and focus on the main survey area. |
|
|
5 |
|
Delete the selected language. |
