Logging in to the Time Clock
Understanding the login steps
How you log in to the Time Clock depends on your company’s setup. Although your manager will explain to you how to properly log in, generally there are two sequential steps that you should understand: 1) Identification and 2) Verification.
Note: Depending on how your Time Clock is configured, to log in to a Time Clock, you might only need to complete the first step of Identification.
Identification
Identification is the first step in logging in to the Time Clock. This step is always associated with either your unique employee ID number or your employee badge number. You can identify yourself in the following ways:
-
Manual entry—Your manager will tell you whether you should enter your employee ID number or your badge number using the touch screen keypad.
-
Badge or card reader—Depending on the Time Clock setup, you might be able to:
-
Slide (or “swipe”) your badge or card through a magnetic card reader slot.
-
Tap your badge or card against the proximity card reader.
-
Hold your badge or card in front of a barcode reader.
-
Verification
Verification of your identity is the second step in logging in to the Time Clock. Depending on your company’s setup, you can verify your identity in the following ways:
-
Manual entry—Enter a Personal Identification Number (PIN) using the touch screen keypad.
-
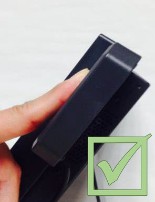
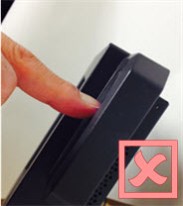
Biometric reader—Place your “registered” finger on the scanner of the biometric reader, which is a device that verifies your identity based on the unique contours of the pad of your finger.
When using a biometric reader, you firmly place the pad of your finger flat on the scanner.


Note: For more information, see the Understanding the Biometric Reader handout.
Logging In
Because the Unifocus Time Clock works with several different hardware components, companies can choose from a variety of configuration options. For example, some companies might set up their Time Clocks so that employees log in using a barcode scanner and then a biometric reader; other companies might have their employees log in using a proximity card followed by manually entering their PINs. Although your manager will provide you with step-by-step login instructions that match your company’s setup, the instructions below will provide a general overview to the login process.
Depending on your company’s Time Clock setup, you might be required to:
-
Have your badge (or ID card) or know your employee ID number. Your manager will tell you which identification method the Time Clock requires.
-
Know your PIN (if your company does not use biometric verification).
-
Identify yourself:
If your company requires that you:
Do the following:
Manually enter your numerical employee ID or badge number:
-
Enter your employee ID or badge number using the touch screen keypad.
-
Press the green arrow to continue.
Use a magnetic card reader:
Slide (or “swipe”) your employee ID or badge through the magnetic card reader
Use a barcode scanner:
Hold your employee ID or badge to the barcode scanner.
Use a proximity card reader:
Tap your employee ID or badge to the proximity card reader.
-
-
Verify your identity:
If your company requires that you:
Do the following:
Manually enter your PIN number:
-
Enter your PIN using the touch screen keypad.
-
Press the green arrow to continue.
Use a biometric reader:
-
Wait for the Time Clock to prompt you to place your finger on the scanner.
-
Place the pad of your finger firmly on the scanner of the biometric reader. Wait for the scanning to finish.
Note: To learn more about correct placement of the finger, see Understanding the biometric reader.
The Time Clock Welcome screen appears.
-