Checklist tab on the New Checklist pane
The first step of creating a checklist is to enter general information about the checklist on the Checklist tab. For more information, see Adding a checklist.
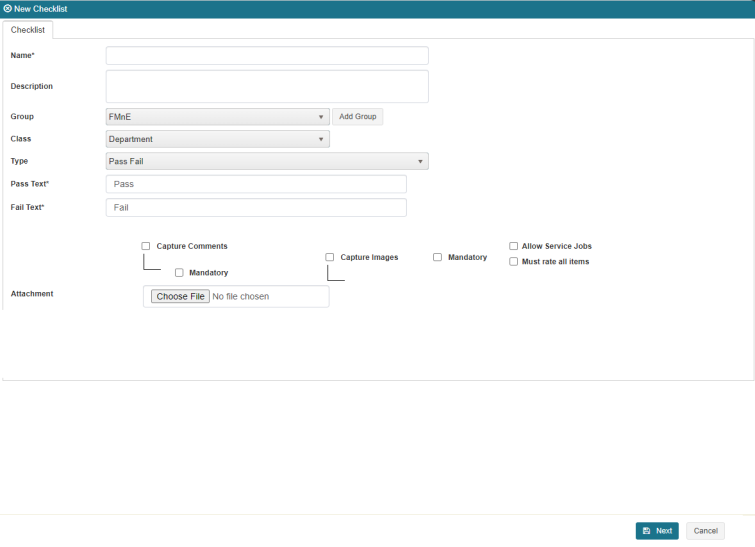
Fields on the Checklist tab
| Field | Description | Notes |
|---|---|---|
|
Name |
Enter a unique name for the checklist. Note: Unifocus recommends using a name that clearly describes what the checklist will be used to inspect. |
Required. |
|
Description |
Enter a description of the checklist. Provide as much detail as possible to help identify the checklist and its intended purpose. |
|
|
Group |
Select the group from the drop-down list that will use the checklist. |
Required. |
|
Add Group |
Open the Add Group pane where you can add a new group, if necessary. |
|
| Class | Select the name of the class from the drop-down list to which the checklist will apply. | |
|
Free Text |
Select the name of the class to which the checklist will apply. |
Required. This field appears when you select Text Input in the Class field. |
|
Select Location |
Open the Select Location pane where you can choose which location(s) the checklist will be used to inspect. |
This field appears only when you select Location in the Class field. |
|
Type |
Select whether the checklist will be graded on a pass/fail basis or whether it will be graded on a numerical rating system. |
Required. |
|
Pass Text |
Enter the text that the inspector selects to pass a checklist item. |
Required. This field appears when you select Pass Fail in the Type field. |
|
Fail Text |
Enter the text that the inspector selects to fail a checklist item. |
Required. This field appears when you select Pass Fail in the Type field. |
|
List |
Use the table to enter the text that the inspector selects to score checklist items. For example, when adding the lowest score, you might enter "Poor" in the Display Text field and "1" in the Value field. |
Required. This field appears only when you select Range of Values in the Type field. |
|
Capture Comments |
If selected, inspectors can enter comments about checklist items. Select the Mandatory checkbox below Capture Comments to require inspectors to enter a comment for all items. |
|
|
Capture Images |
If selected, inspectors can attach images to checklist items. Select the Mandatory checkbox below Capture Images to require inspectors to attach images for all items. |
|
|
Allow Service Jobs |
If selected, inspectors can create Service jobs for items that require attention. |
|
|
Must rate all items |
If selected, inspectors are required to select a response for all items. |
|
|
Attachment |
Select Choose File to attach an image or file to the checklist. For example, you can include an image of what a room should look like after a successful inspection or a PDF document that provides a list of guidelines. |
|
|
Next |
Saves your changes and opens the Category tab on the New Checklist pane. |
If you are editing a checklist, this button is labeled Save. |
|
Cancel |
Closes the pane without saving your checklist. |