Analyzing your plan
After you have redistributed work content, you are ready to analyze your plan.
-
In the upper-left corner of the screen, select Access your applications (
 ).
).
The menu expands. -
Select Labor > Timeline Scheduling.
The Timeline Scheduling screen appears.
-
Change the bottom timeline view to Workflow view, which displays the work content that is distributed to your planned shifts.
 Click here for field descriptions.
You use the operations section at the top of the Timeline Scheduling screen to control how you view schedules and timeline views in the scheduling section.
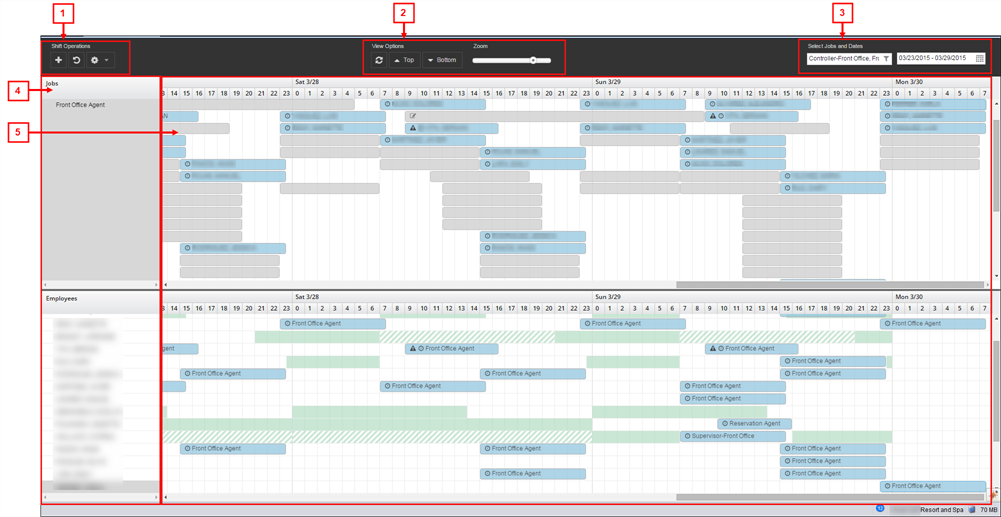
When you first open the Timeline Scheduling screen, a single timeline view opens with the Job view selected.
Operations section – control descriptions
# Control Description Notes 1
Shift Operations

Add Shift
Opens the Add Shift dialog box.
For more information, see the following:

Undo
Undoes the most recent action.

Gear
Opens a drop-down list to select the following:
-
Copy Schedules—Click to open the Copy Schedules dialog box. Use this option to copy an existing schedule from one planning period to another. For more information, see Copying shifts in Timeline Scheduling.
-
Clear Schedules—Clears all schedules. After selecting this option, a confirmation dialog box appears to verify that you want to clear all schedules. For more information, see Working with schedules in Timeline Scheduling.
-
Clear Shifts—Clears all shifts. After selecting this option, a confirmation dialog box appears to verify that you want to clear all shifts. For more information see Working with schedules in Timeline Scheduling.
-
Recalculate Shifts—Recalculates shifts and applies any changes made to a configuration. For more information, see Recalculate Shifts dialog box in Timeline Scheduling.
-
Generate Schedules—Open the Generate Schedules dialog box. For more information, see the Generate Schedules dialog box in Timeline Scheduling.
-
Restore Auto Schedule—Reverts to the original system-generated schedules for the selected jobs. This option is useful if you generate schedules, make changes, and then want to restore the autoschedule. For more information, see Restore Auto Schedules dialog box in Timeline Scheduling.
-
Redistribute Work Content—Creates planned shifts based on the work content in the Work Content view. For more information, see Using the Work Content and Workflow views.
If you clear all schedules using the Clear Schedules option, this action cannot be undone.
If you clear all shifts using the Clear Shifts option, this action cannot be undone.
The Recalculate Shifts option is used mainly by Unifocus Service Desk and Implementation.
2
View Options

Refresh
Refreshes the views in the Timeline Scheduling screen.
This feature is helpful if you have added or edited many shifts and want to ensure that you are viewing the most current schedule that has been updated with all of your changes.

Top
Opens drop-down list to select the following:
-
Job View—Select to display the Job timeline view.
-
Employee View—Select to display the Employee timeline view.
-
Show Statistics—Select to display the Statistics timeline view.
-
Work Content View—Select to display the Work Content timeline view.
-
Workflow View—Select to display the Workflow timeline view.
When using single-timeline view, use the view you see in the scheduling section. When using dual-timeline view, use this drop-down list to select the view for the top panes in the scheduling section.
The Work Content view applies only to event-related job standard types.

Bottom
Opens drop-down list to select the following:
-
Hide—If using dual-timeline view, select to hide the bottom panes and return to the single-timeline view.
-
Job View—Select to display the Job timeline view.
-
Employee View—Select to display the Employee timeline view.
-
Show Statistics—Select to display the Statistics timeline view.
-
Work Content View—Select to display the Work Content timeline view.
-
Workflow View—Select to display the Workflow timeline view.
When using dual-timeline views, use this drop-down list to select the view for the bottom panes in the scheduling section.
The Bottom drop-down menu applies only to the dual-timeline schedule views.
The Work Content view applies only to event-related job standard types.
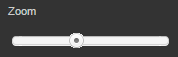
Zoom slider
Zooms in and out of the timelines in the schedule panes.
-
To zoom in, move the slider to the right.
-
To zoom out, move the slider to the left.
For more information, see Working with the scheduling section of Timeline Scheduling.
3
Select Jobs and Dates

Job selector
Opens the Labor Selector dialog box. Use this dialog box to filter what types of job and employee groupings appear in the left pane.
For more information, see Labor Selector dialog box in Timeline Scheduling.

Calendar selection
Opens drop-down menu to select the date range that appears in the schedule pane.
Scheduling section
You use the scheduling section to schedule labor and view work content, workflow, and statistics. This section contains two panes: the left pane and the schedule pane. If you are using dual-timeline views, there is a left and schedule pane for each view.
# Pane Description Notes 4
Left pane(s)
Depending on your selected view, this pane displays:
-
Jobs—List of jobs.
-
Employees—List of employees.
-
Work Content—Distributed and undistributed work required to complete an event.
-
Workflow—Workflow relative to planned shifts.
-
Statistics—Statistics for job groups.
Read-only.
5
Schedule pane(s)
This pane displays the timeline that correspond to the selected view in the left pane.
The appearance of the timeline in this schedule pane depends on the zoom magnification. If the zoom slider is moved all the way to the left (zoomed out), the timeline displays each day as a separate entry. If the zoom slider is moved all the way to the right (zoomed in), you see an hourly breakdown of each day. Shifts and work content appear as bars on the schedule.
-
-
In the column menu, make sure the following filters are set:
Filter type Setting System Projected Hours
Clear
Manager's Planned Hours
Selected
Show Stats Shift Hours
Selected
Distributed Hours
Selected
Undistributed Hours
Selected
-
Evaluate your plan compared to the system plan using the provided statistics of shift hours, distributed hours, and undistributed hours.
Note: Viewing shift utilization in the Job view might be helpful. Shift utilization adds a thin green bar to each shift to display the amount of work content distributed to each shift. For more information, see Controlling the Job view.