Labor Structure screen
Overview
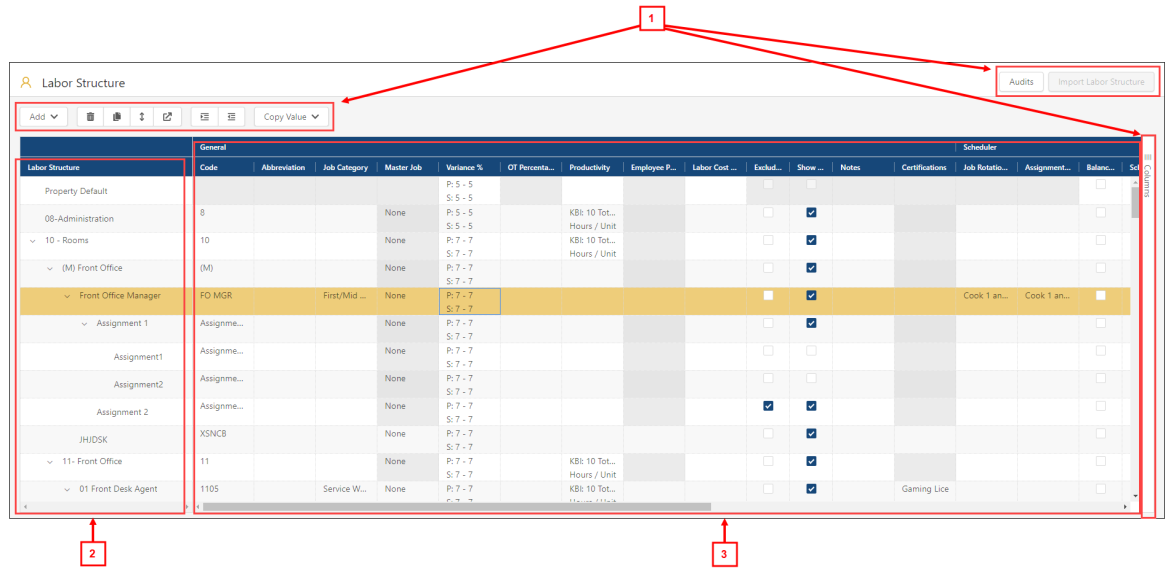
The Labor Structure screen consists of three main sections:
-
(1) Controls —Controls for editing the labor structure, viewing a history of changes, importing a labor structure, and customizing the table view.
-
(2) Labor structure tree menu—A collapsible/expandable tree menu containing all organization levels in your organization's labor structure.
-
(3) Configuration sections—Sections, grouped by related areas, where you configure information for jobs, schedules, time and attendance, and default rates.
Controls

Controls on the Labor Structure screen
| Section / Controls | Description | Notes |
|---|---|---|
|
Audits |
View a history of changes to the screen. |
|
|
Import Labor Structure |
Imports a labor structure. |
|
|
Add |
Add a labor structure level at the same level as or one level below the selected labor structure level. The Add drop-down list options depend on which organization level is selected in the Labor Structure tree menu. For example, if a Rooms division is selected, the options are Add Division and Add Department. If the Front Office department is selected, the options are Add Department and Add Job. If the property is selected, only the Add Division option is available. These options can also be selected by right-clicking an organization level and selecting an option from the context menu. |
|
|
Delete |
Deletes the selected labor structure level. |
This button is not available for the property. A property cannot be deleted. |
|
Copy |
Creates a copy of a department, job, or assignment. A copy contains the same information and configurations as the original labor structure level. You might copy an organization level if you need to create a new one that differs only slightly from the original. You can then edit the fields that differ. |
This button is not available for the property or divisions. These labor structure levels cannot be copied. |
|
Move |
Moves a department, job, or assignment to a different division, department, or job. |
This button is not available for the property or divisions. These labor structure levels cannot be moved. |
|
Open Labor Structure |
Opens the Labor Standards screen to the selected labor structure level. |
|
|
Expand All | Collapse All |
Options include:
|
|
|
Copy Value |
Copy Value options allow you to apply a configuration to child lines in the labor structure. Options include:
|
|
|
Column settings |
Expands the column settings pane where you can select which columns appear in the table. |
|


 )—Expand the tree menu to display all labor structure levels.
 )—Collapse the tree menu to display only top levels of labor structure levels.
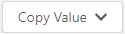
Labor structure tree menu
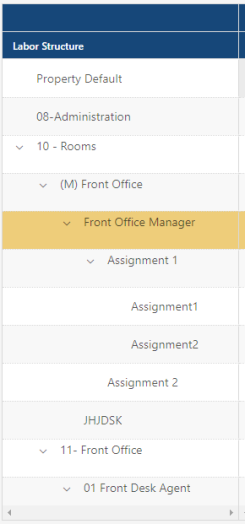
Labor structure tree menu
| Field | Description | Notes |
|---|---|---|
|
Labor structure |
A collapsible/expandable tree menu of all organization levels within your labor structure. |
Read-only. |
Configuration sections
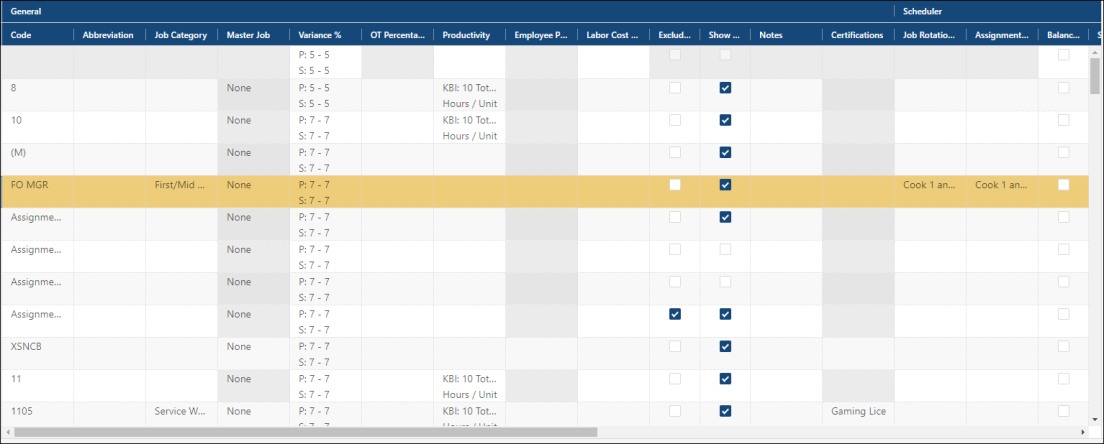
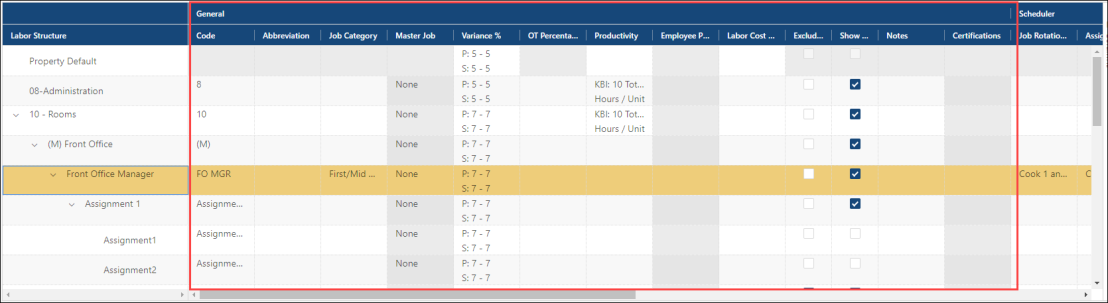
Columns in the General section of the Labor Structure screen
| Column | Description | Notes |
|---|---|---|
|
Code |
Assign an alternative identifier for the item. This code appears on most reports. |
|
|
Abbreviation |
Enter an abbreviation for a job that differentiates it from other jobs with the same name but that exist in different departments or divisions. |
|
|
Job Category |
Associate a job with a job category. For more information, see Job Categories. |
|
|
Master Job |
Configure jobs from different properties and link them to a master Job. For example, if you have Cook1 at three properties, you could set the Master Job (Division/Department/Job) to Kitchen/Cook/Cook1 and the information from all Cook1's will be displayed in reports as the same job. |
Required. |
|
Variance Percentages |
Define a tolerance range for acceptable variances between projected hours/scheduled hours or standard hours/actual hours.
An entry in these fields overrides the entry you made in the Property Labor/Scheduler screen (Setup > Property > Labor/Scheduler). |
|
|
OT Variance Percentages |
Enter overtime (OT) as a percent of total hours. For example, if you enter "3" in OT Variance Percentage, you are specifying that 3 percent overtime is the variance percentage; therefore, in the Manage Schedules screen, any number above 3 percent sends a warning. |
|
|
Productivity |
Determine the work rate associated with this job. For example, how fast can a job be accomplished, how many products can be produced when performing this job, and so on. This information is only used for the Labor Productivity report.
|
|
|
Employee Productivity |
Settings for a job that requires tracking of employee-level productivity. These settings determine which employees appear in the Employee Productivity screen. Double-clicking the cell opens the Employee Productivity dialog box, where you configure the following fields:
|
|
|
Labor Cost Percentage |
Specify the revenue-based KBI used to calculate the labor cost percentage at the organization level. Double-click the table cell and select the KBI from the drop-down list in the dialog box. |
This field can only be edited if you have an Operating Budgeting license. |
|
Exclude from Payroll Export |
Determine whether the job information is included in the payroll export. If selected, job information is not included in the payroll export. |
|
|
Show on Dashboard |
Determine which divisions, departments, and/or jobs are displayed on the Labor Dashboard. |
|
|
Certifications |
Associate a certification with a job. For more information, see Certifications tab of Employee Maintenance. |
|
|
Notes |
Enter comments. |
|
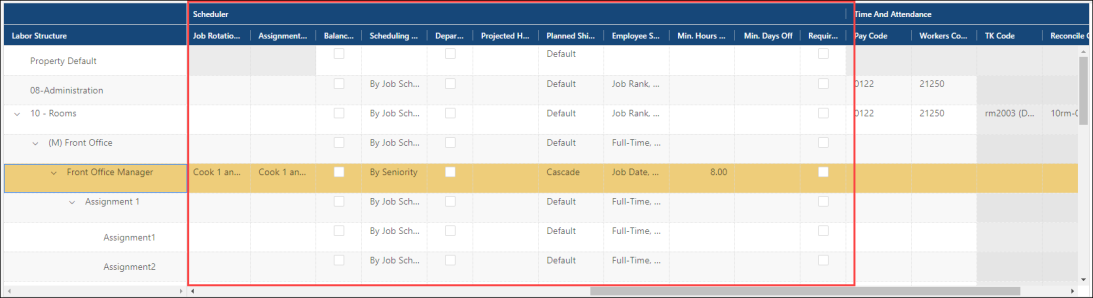
Columns in the Scheduler section of the Labor Structure screen
| Column | Description | Notes |
|---|---|---|
|
Job Rotation Plan |
Apply a rotation plan to a job. You select the previously configured Rotation Plans from the drop-down list. |
|
|
Assignment Rotation Plan |
Apply a rotation plan to the assignments in the job. You select the previously configured Rotation Plans from the drop-down list. |
|
|
Balance Schedules |
If selected, the software attempts to schedule the same number of hours for all employees. This feature can be useful during slower periods when you want to keep all employees on the schedule. The software divides the total labor requirements by the number of employees and schedules all of them for the same number of hours. |
|
|
Scheduling Method |
Determine what criteria is used to prioritize scheduling.
|
|
|
Departmental Seniority |
Control how the Job Date and Job Rank sort orders behave. If selected, the software finds and uses the earliest date or lowest rank of any job in the same department. If cleared, the software looks at and uses the individual job seniority dates or ranks. |
|
|
Projected Hours Reduction Method |
Determine how to schedule if you have too few employees to cover the projected work.
|
|
|
Planned Shift Sorting Method |
Determine how the shifts are sorted before scheduling occurs. Each of the methods produce a different weekly schedule. Your selection is important if the job is typically understaffed.
|
Day Order is available only if you selected By Day as the Scheduling Method. |
|
Employee Sort Order |
Opens the Employee Sort Order dialog box, where you define the scheduling order for this job. The top-to-bottom order determines which employees get scheduled first and how they are chosen. Click and drag ( If you have two employees with the same Hire Date, RMS goes through the order you specified until it finds a difference and creates the schedule accordingly. If all criteria for two employees are exactly the same, RMS will look at the full-time status of the employees and schedule them before part-time employees. If there are no differences found, RMS will ultimately default to an alphabetical sort order.
|
|
|
Min. Hours Off |
Minimum number of hours an employee must have off between shifts. If you enter "8" here and the employee is scheduled from 14:00 to 22:00, the employee will not be scheduled again until 06:00 the next morning. If there is no minimum time off between shifts, enter "0". |
|
|
Min. Days Off |
Minimum number of consecutive days an employee must have off between shifts. If your policy is to give two consecutive days off, enter "2" in this field so that an employee who is scheduled Thursday through Monday will not be scheduled again until Thursday. If you do not have a policy on consecutive days off between shifts, enter "0". |
|
|
Requires Approval |
If selected, schedules for the selected labor structure level require approval in the Manage Schedules screen. For more information, seeWorking with the Manage Schedules screen. |
|
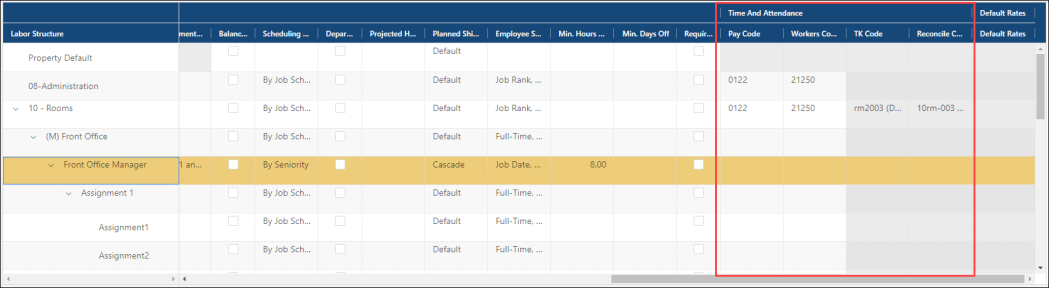
Columns in the Time & Attendance section of the Labor Structure screen
| Column | Description | Notes |
|---|---|---|
|
Pay Code |
Pay code in the payroll system that corresponds to the job. |
|
|
Workers Comp. Class |
Code used to interface with the payroll system. |
|
|
TK Code |
Codes from a third-party timekeeping system that are used to import worked hours into the job in Unifocus for reporting purposes. If there is more than one TK code, the incoming worked hours data will be summed into the job. |
|
|
Reconcile Code |
Reconcile Code associated with the employee's job status. This code is used to import employee information from another HR/Payroll system. It is only visible if you do not use Pay Code Overrides. |
|

Columns in the Default Rates dialog box (accessed from the Default Rates section of the Labor Structure screen)
| Column | Description | Notes |
|---|---|---|
|
Effective Date |
Define the date after which the rate goes into effect. |
|
|
Hourly Rate |
Define the default hourly rate. |
|
|
Minimum Wage |
Define the allowable minimum wage. |
|
|
Tip Rate |
Indicate the minimum amount of tips an employee should be reporting. If an employee's reported tips are less than the amount entered here, a prompt is displayed when the employee punches out. For example:
|
|